
3D Printed Logo Installation Cast in Epoxy Resin
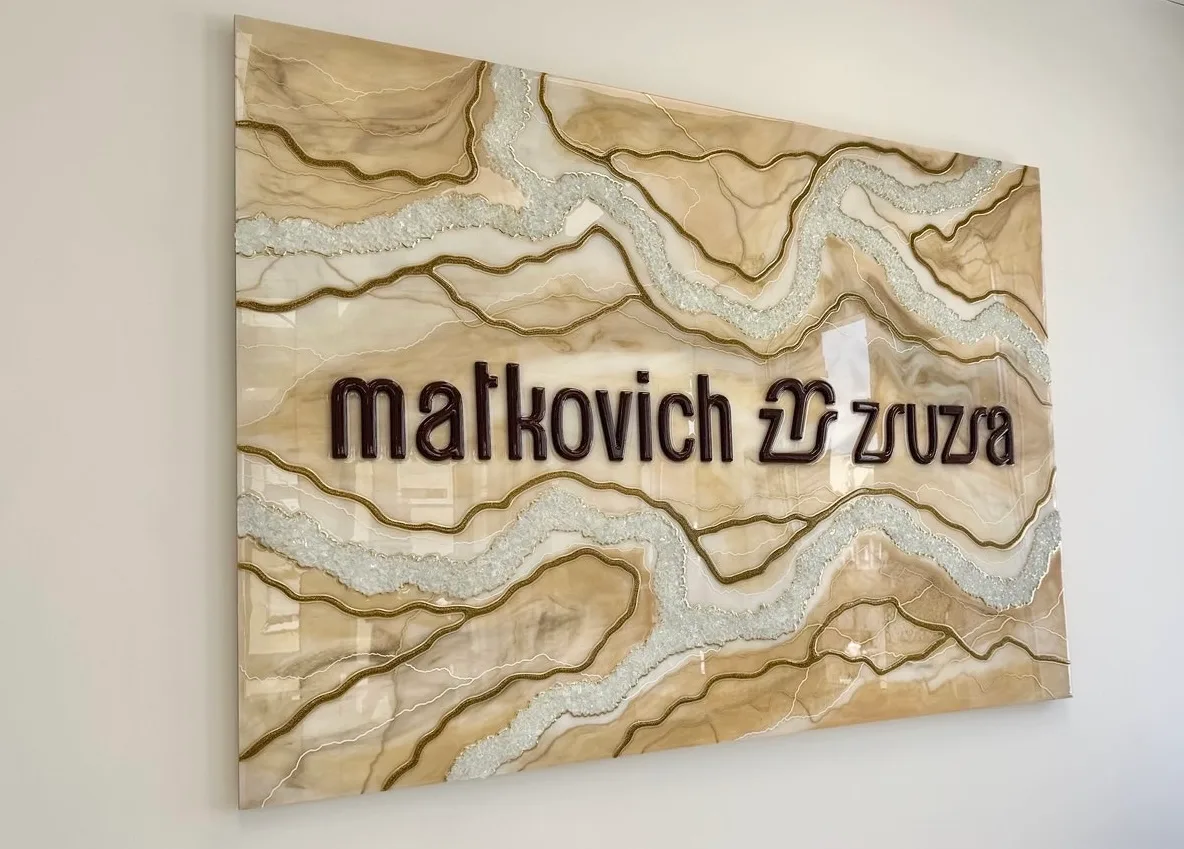
Custom branding elements and installations that reinforce a brand experience play an increasingly large role in modern corporate spaces. A large-format, spatial logo, though, is rarely a simple graphics task — it’s more often a parts-manufacturing process that calls for engineering design, material selection, and precise manufacturing-technology decisions.
This project came to us through Dorina Burján, an epoxy resin artist: one of her clients needed a large, spatial logo installation for an office environment, which Dorina would then cast into its final form in epoxy resin. Our part was the digital preparation, choosing the manufacturing technology, and printing the parts themselves.
The challenge: a graphic logo into a manufacturable 3D model
The starting point was a graphic design in SVG format. SVG is excellent for handling two-dimensional graphics, but it can’t be used directly for additive manufacturing on its own.
Turning a 2D design into a manufacturable 3D model took several steps:
- processing and cleaning up the vector graphic’s geometry,
- determining the right wall and letter thickness,
- checking printability,
- separating out the individual letterforms and logo parts.
The goal wasn’t simply an impressive-looking model, but a construction that would print stably, have adequate rigidity, behave well during the epoxy pour, and deliver good visual quality without post-processing. So the digital preparation followed a reverse-modeling mindset: turning the available graphic data into a 3D geometry optimized for manufacturing.
Material selection: why PETG was the right call under epoxy
For decorative elements, many people think of color first — but embedded in epoxy, in an industrial setting, there’s more to weigh. The installation was for indoor use, would be cast into epoxy resin, and would function as a long-term visible decorative element.
PLA offers the widest color range, but its lower heat resistance and more brittle mechanical behavior make it less suited to durable, embedded parts. PETG, by contrast, offers better impact resistance, higher heat resistance, and a less brittle structure. Long-term durability mattered more in this project than the widest possible color choice — so we went with self-colored brown PETG. (We cover the PLA vs. PETG choice in more depth in our 3D printing basics article.)
MSLA or FDM? Choosing the manufacturing technology
We also considered MSLA — an excellent choice when the goal is extremely fine detail or a flawless surface finish on smaller parts. Here, though, it would have needed considerably more post-processing: washing, UV post-curing, priming, painting, varnishing. That could have produced a visually excellent result, but it would have significantly increased both production time and cost.
Since the goal was an economical, reliable solution that would reproduce well even at large scale, we went with FDM. (We cover how FDM and MSLA work, and how to choose between them, in more detail in this article.)
Prototyping and pour tests
Before producing the final parts, we made sample pieces for pour testing. We checked how well the epoxy adhered to the printed surface, how visible the layer lines were, and which layer height gave the best surface quality.
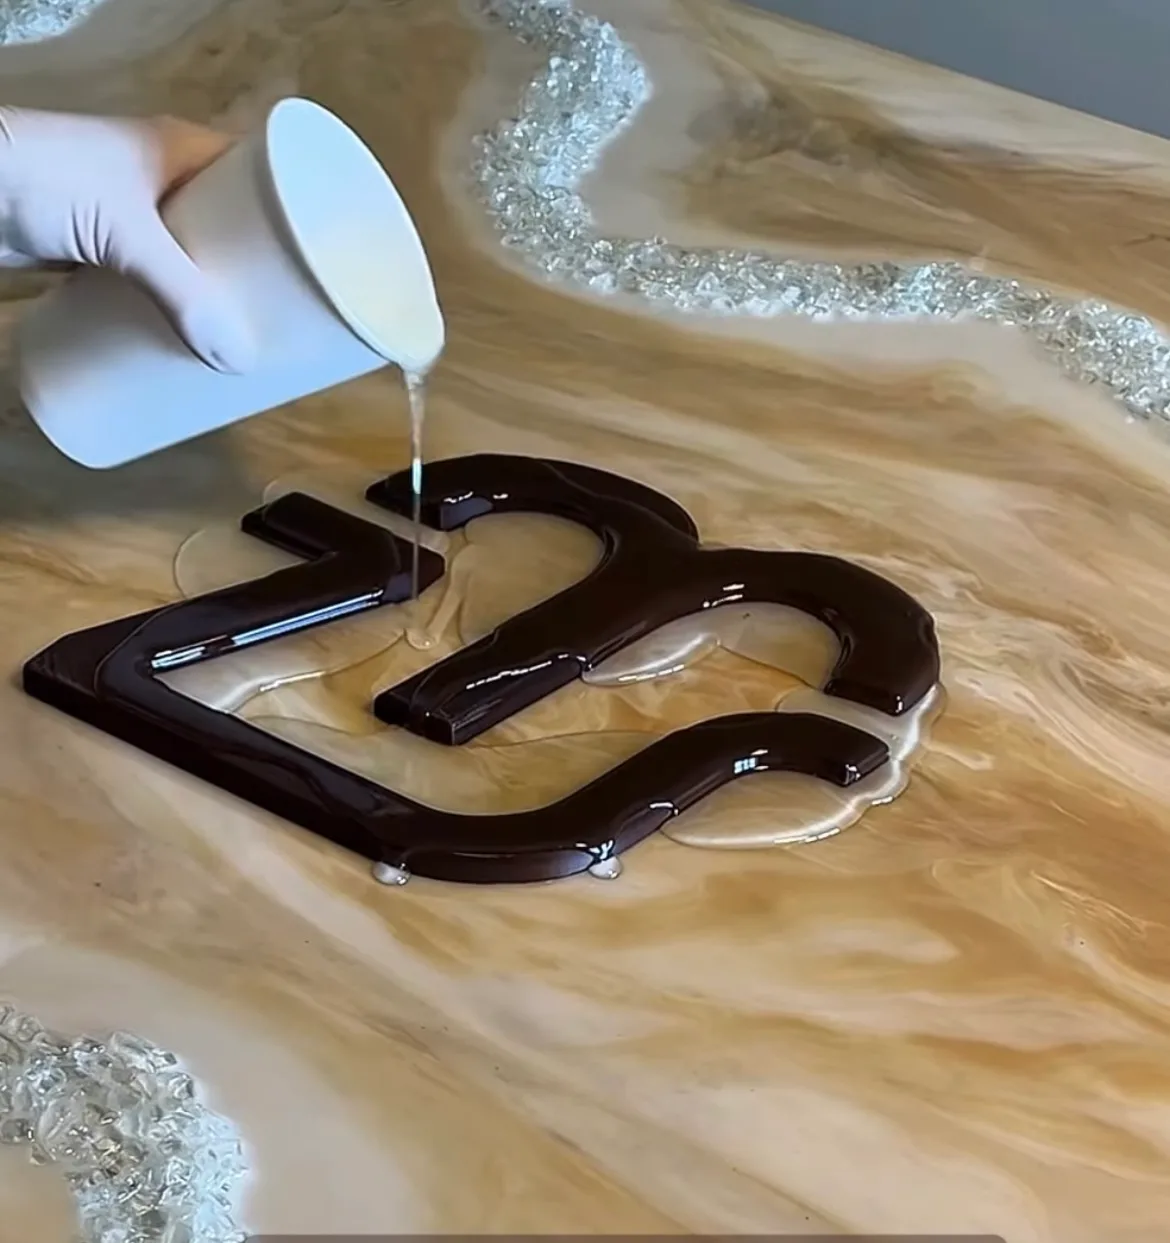
Based on the tests, a 0.2 mm layer height gave the right balance between production time and surface quality for the chosen geometry. The epoxy resin spread evenly and optically reduced the visibility of the layering significantly — on the final piece, the print layer lines weren’t distracting even without further surface treatment.
Final production and the installation
Once testing wrapped up, we produced the final parts: in brown PETG, with the optimized geometry and controlled print parameters established during testing.
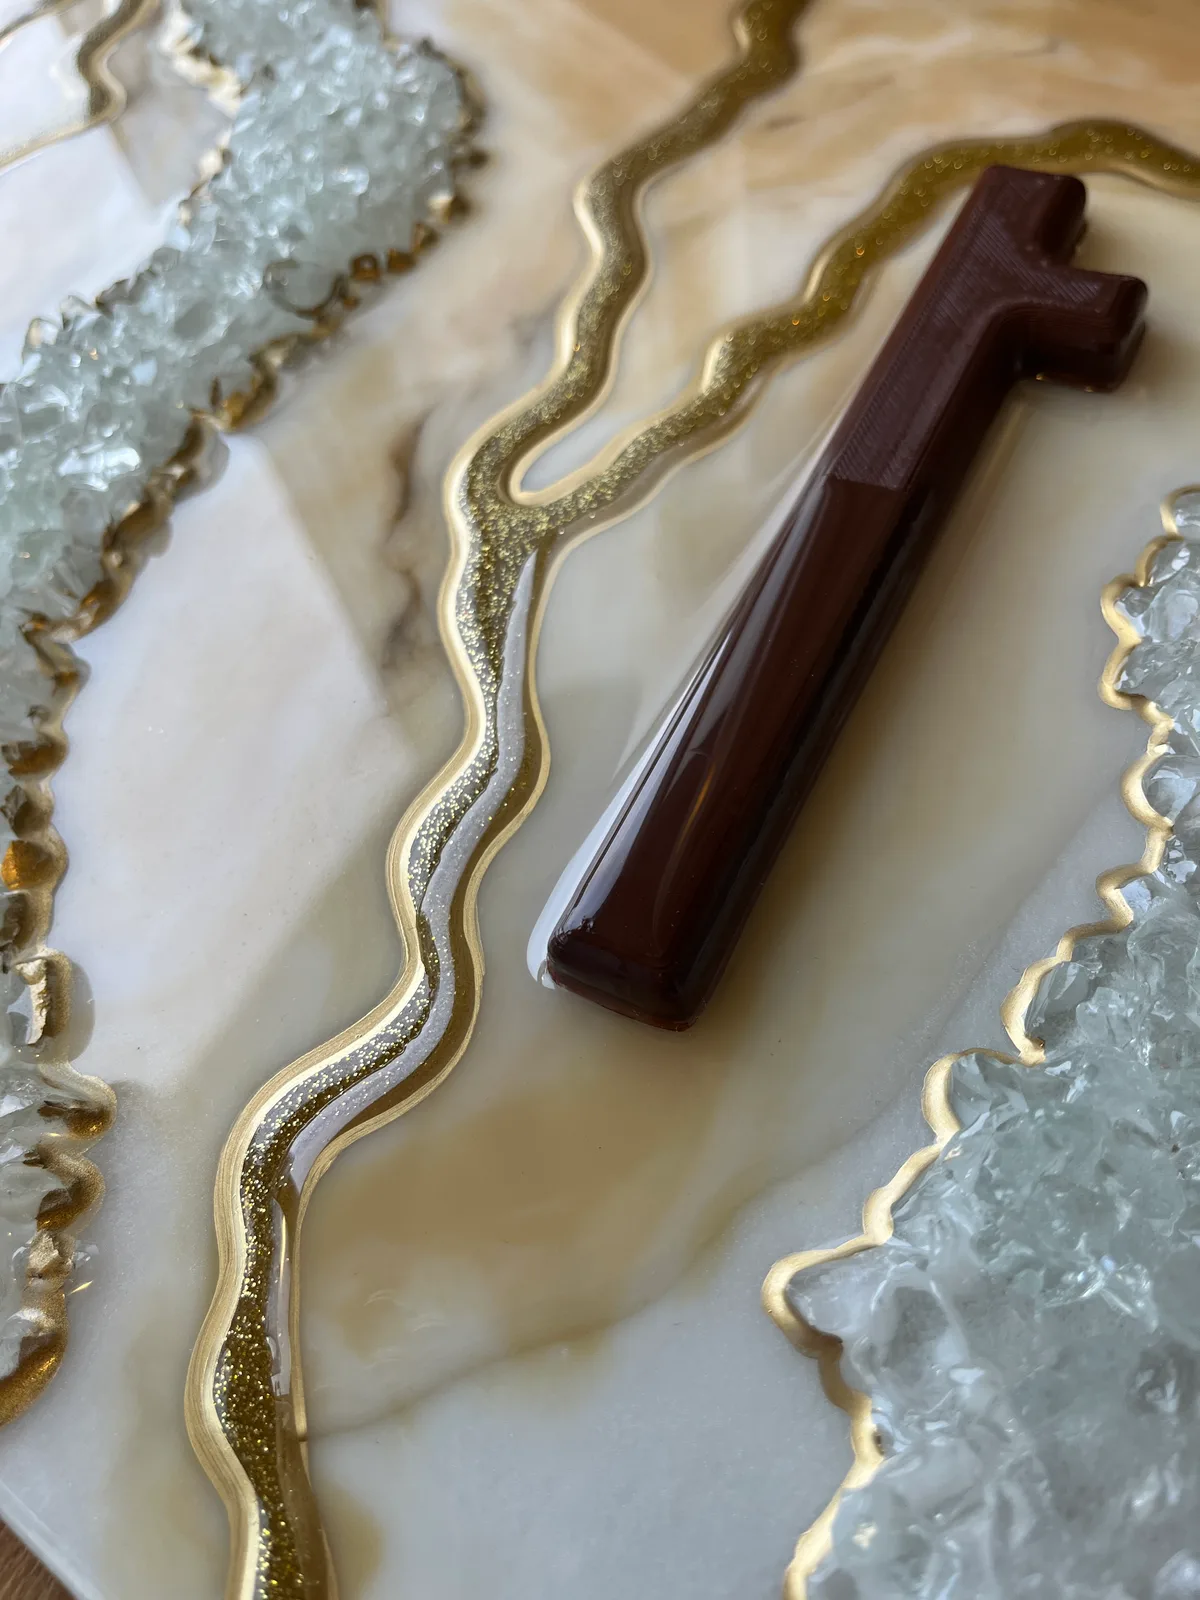
After the parts were handed over, Dorina carried out the epoxy casting: the parts fit correctly, the pour went smoothly, and the visual result met expectations.
Summary
This project is a good illustration that successful additive manufacturing isn’t just about the printer — the right combination of technology, material, and design decisions is what produces a professional result. Whether it’s a custom installation, an interior branding element, or a small production run, we support our clients with engineering backing through the whole process. If you have a custom manufacturing challenge, get a quote for our parts manufacturing service — we’ll take you through the whole process, from digital preparation to the finished part.
Related Articles
Planning a Similar Project?
Send us your model or drawing — free consultation, with personalized quotes within 24 hours.