Remanufacturing the Sztárbox Championship Belt Emblem with 3D Scanning and MSLA Printing
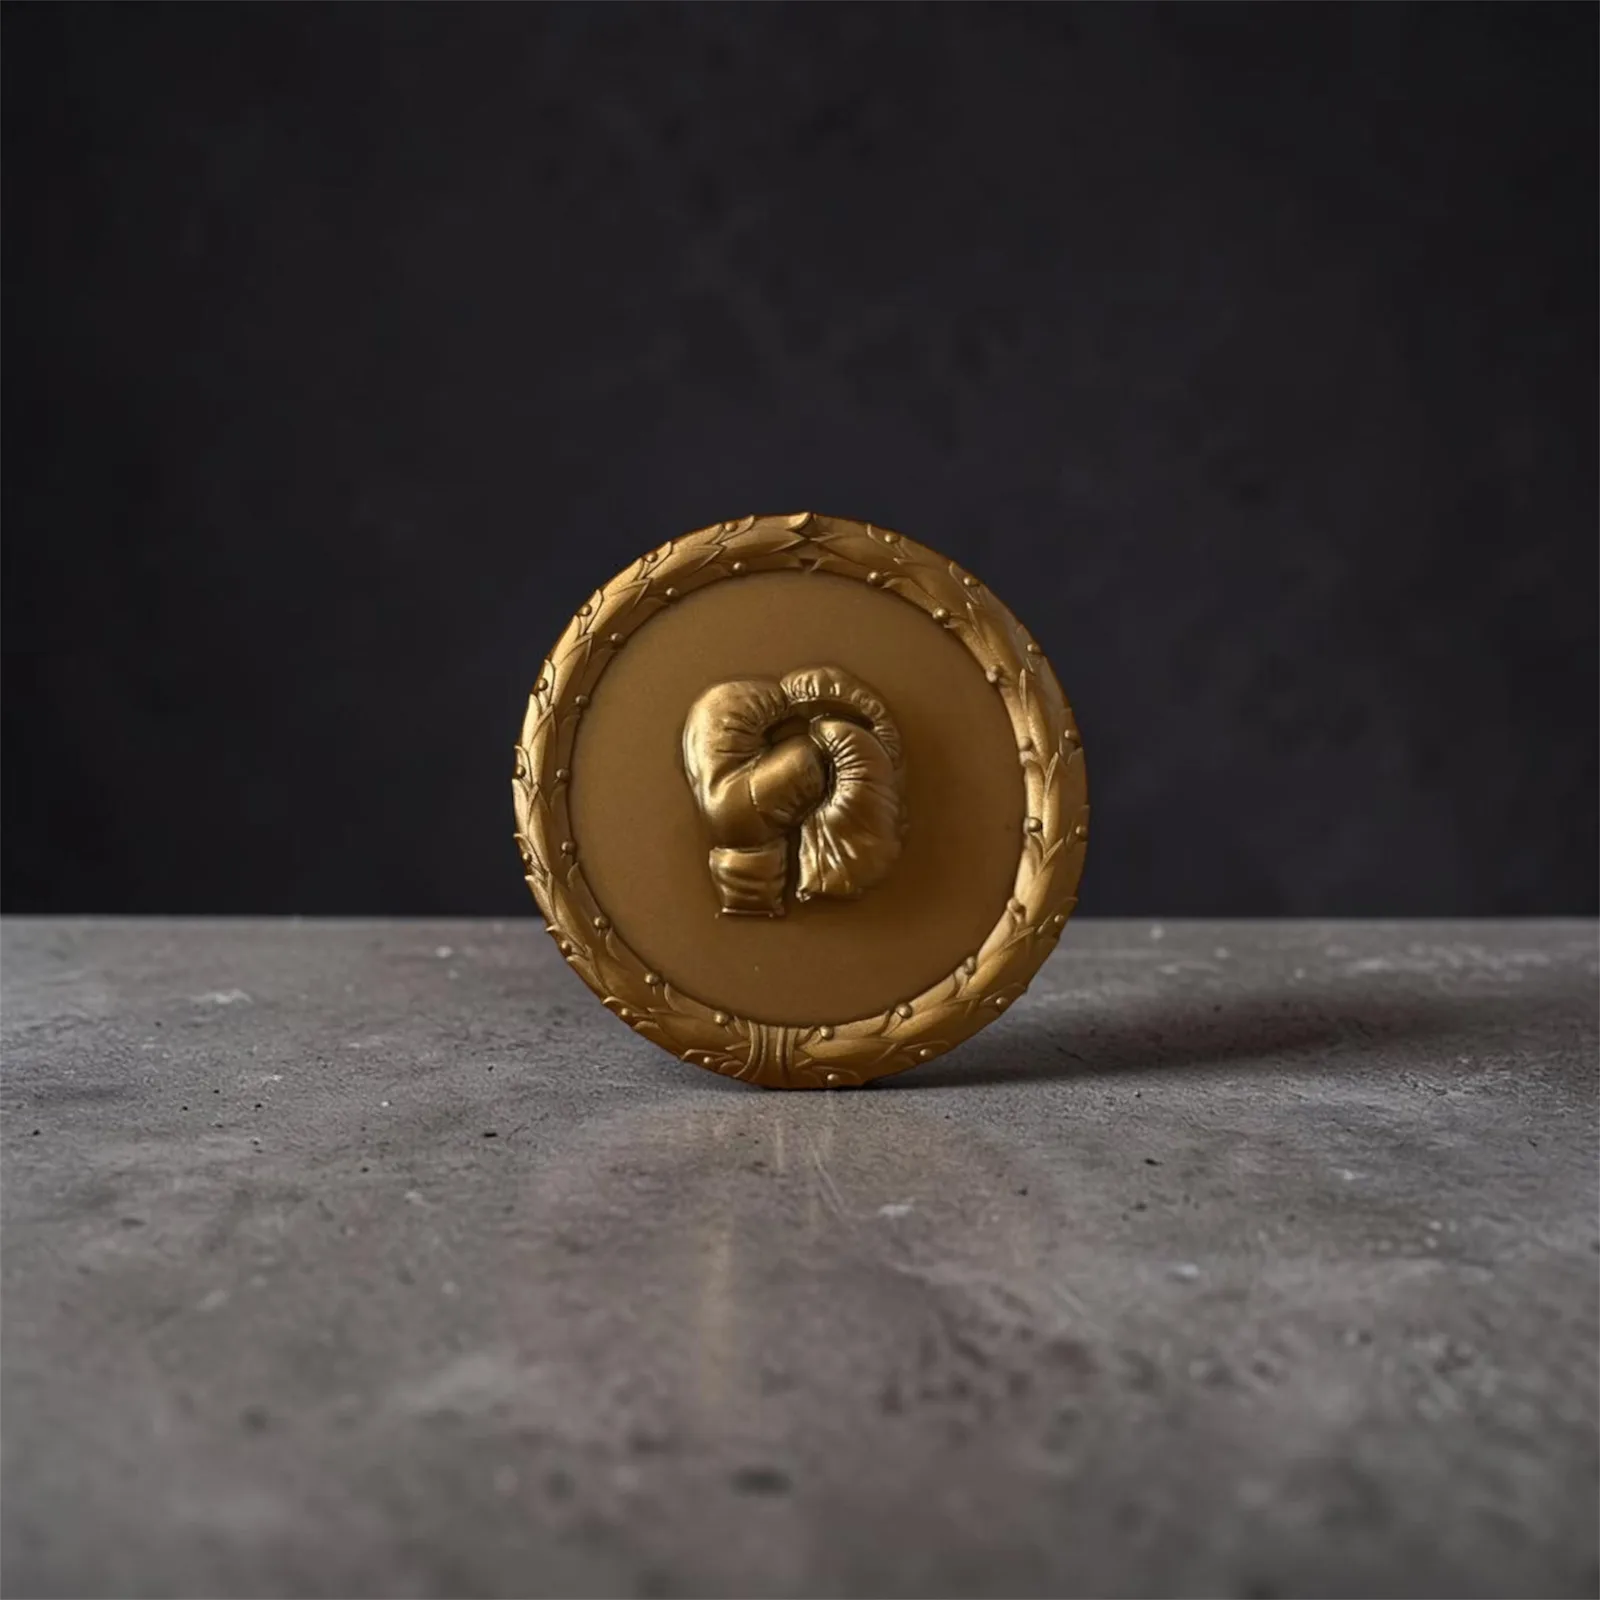
In modern television productions, sporting events, and live shows, visual presentation carries serious weight. An iconic object, trophy, or decorative emblem is never just decoration — it’s part of the brand, the event, and the professional appearance on screen. That’s exactly why these pieces have to meet a high bar not just aesthetically, but for durability, mountability, and repeatable manufacturability too.
We ran into precisely this challenge on a project to remanufacture the seasonal championship belt emblems for RTL’s Sztárbox show. The belts had to be recreated based on emblems used in previous seasons — but the earlier production method carried several problems that made long-term use difficult.
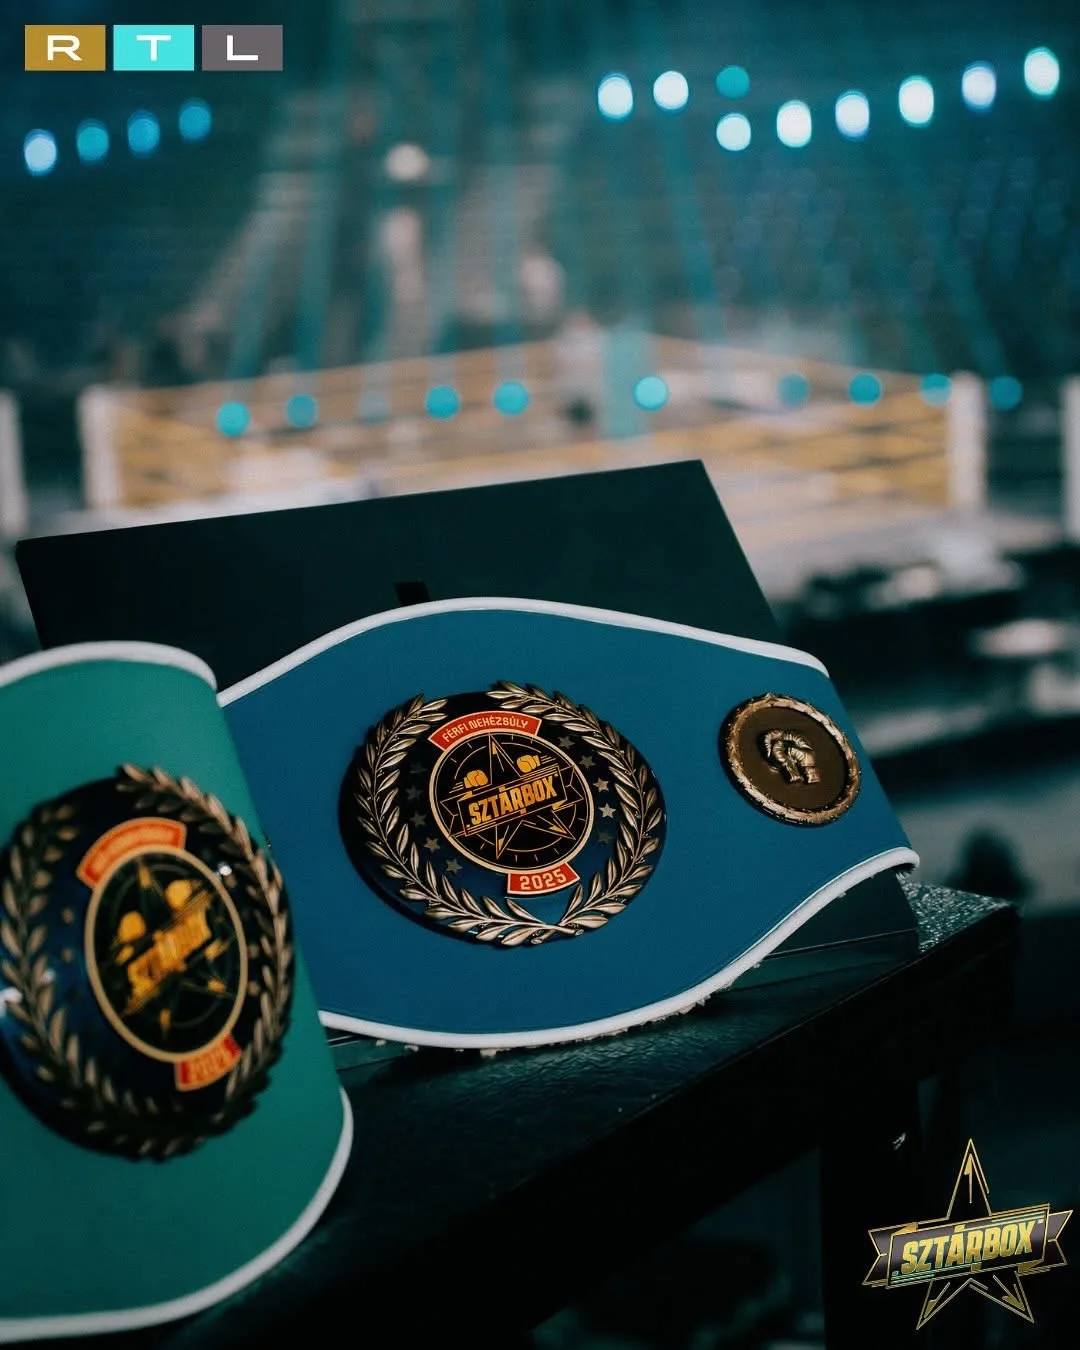
Over the course of the project, we combined 3D scanning, reverse-modeling, industrial 3D printing, and professional post-processing into a new manufacturing workflow that delivered a higher-quality aesthetic result while also meaningfully improving mountability and durability.
The starting problem: when an existing part no longer meets today’s expectations
The client gave us the emblems used in previous years. They had originally been made with FDM technology, assembled from several separate printed pieces, then glued together and simply painted.
The earlier process was workable at a lower standard, but several problems surfaced with real-world use:
- surface quality wasn’t good enough for close-up television camera shots,
- the seams between the multiple assembled pieces stayed visible,
- the painting process was awkward because of the geometry,
- the mounting wasn’t durable enough,
- the pieces gradually loosened with use.
So the first step of the project wasn’t simple copying — it was an engineering assessment. We wanted to understand exactly what problems the original design caused in practice, and to eliminate them at the design stage this time.
Reverse-modeling from an existing sample piece
When there’s no CAD model available for an existing part, decorative element, or industrial component, reverse-modeling is an effective solution: we digitize the physical sample, then rebuild the three-dimensional model from an engineering perspective.
The main steps of the workflow on this project:
- Examining the sample piece — analyzing the geometry, identifying structural problems, spotting manufacturing defects.
- 3D scanning and geometric digitization — precisely capturing the existing pieces digitally, processing complex organic shapes, establishing reference surfaces.
- CAD-based redesign — manufacturability changes, designing mounting points, optimized part breakdown.
The goal wasn’t to simply copy the original shape, but to create a new design that meets modern manufacturing and usage requirements. One of the biggest advantages of proper reverse-modeling is that past manufacturing flaws don’t automatically carry over into the new product.
Uncovering design problems and engineering the redesign
The original emblems were built from several separate pieces: the central element consisted of a laurel wreath, a central body, and a glued-on decal and acrylic sheet, with the side emblems following a similar structure. That layout could have been a reasonable direction on its own, but the earlier design didn’t always support efficient manufacturing and finishing.
Why splitting the part correctly matters
A common mistake in 3D printing is treating a complex object as a single large model, when manufacturing and finishing considerations often make it better to split it into several parts. We split the piece into separate elements for several reasons on this project:
- simpler, more precise painting,
- better access to every surface,
- lower printing risk,
- optimized production time,
- easier assembly.
A good 3D-printed part doesn’t necessarily come out of the printer in one piece — the right design breakdown often produces a higher-quality result.
Why we switched from FDM to MSLA
The FDM 3D printing used in the earlier production is an excellent choice for many industrial applications, especially functional parts, prototypes, and smaller batches. (For more on how the two technologies work, see one of our earlier articles: How Does a 3D Printer Work? — FDM and MSLA Explained.) In this case, though, the main requirement wasn’t mechanical load-bearing — it was outstanding visual quality.
The laurel wreath posed the biggest challenge: it contained tiny details, had complex curved surfaces, and was clearly visible even from close camera angles. FDM’s layer lines and the post-processing they’d require wouldn’t have been the ideal choice.
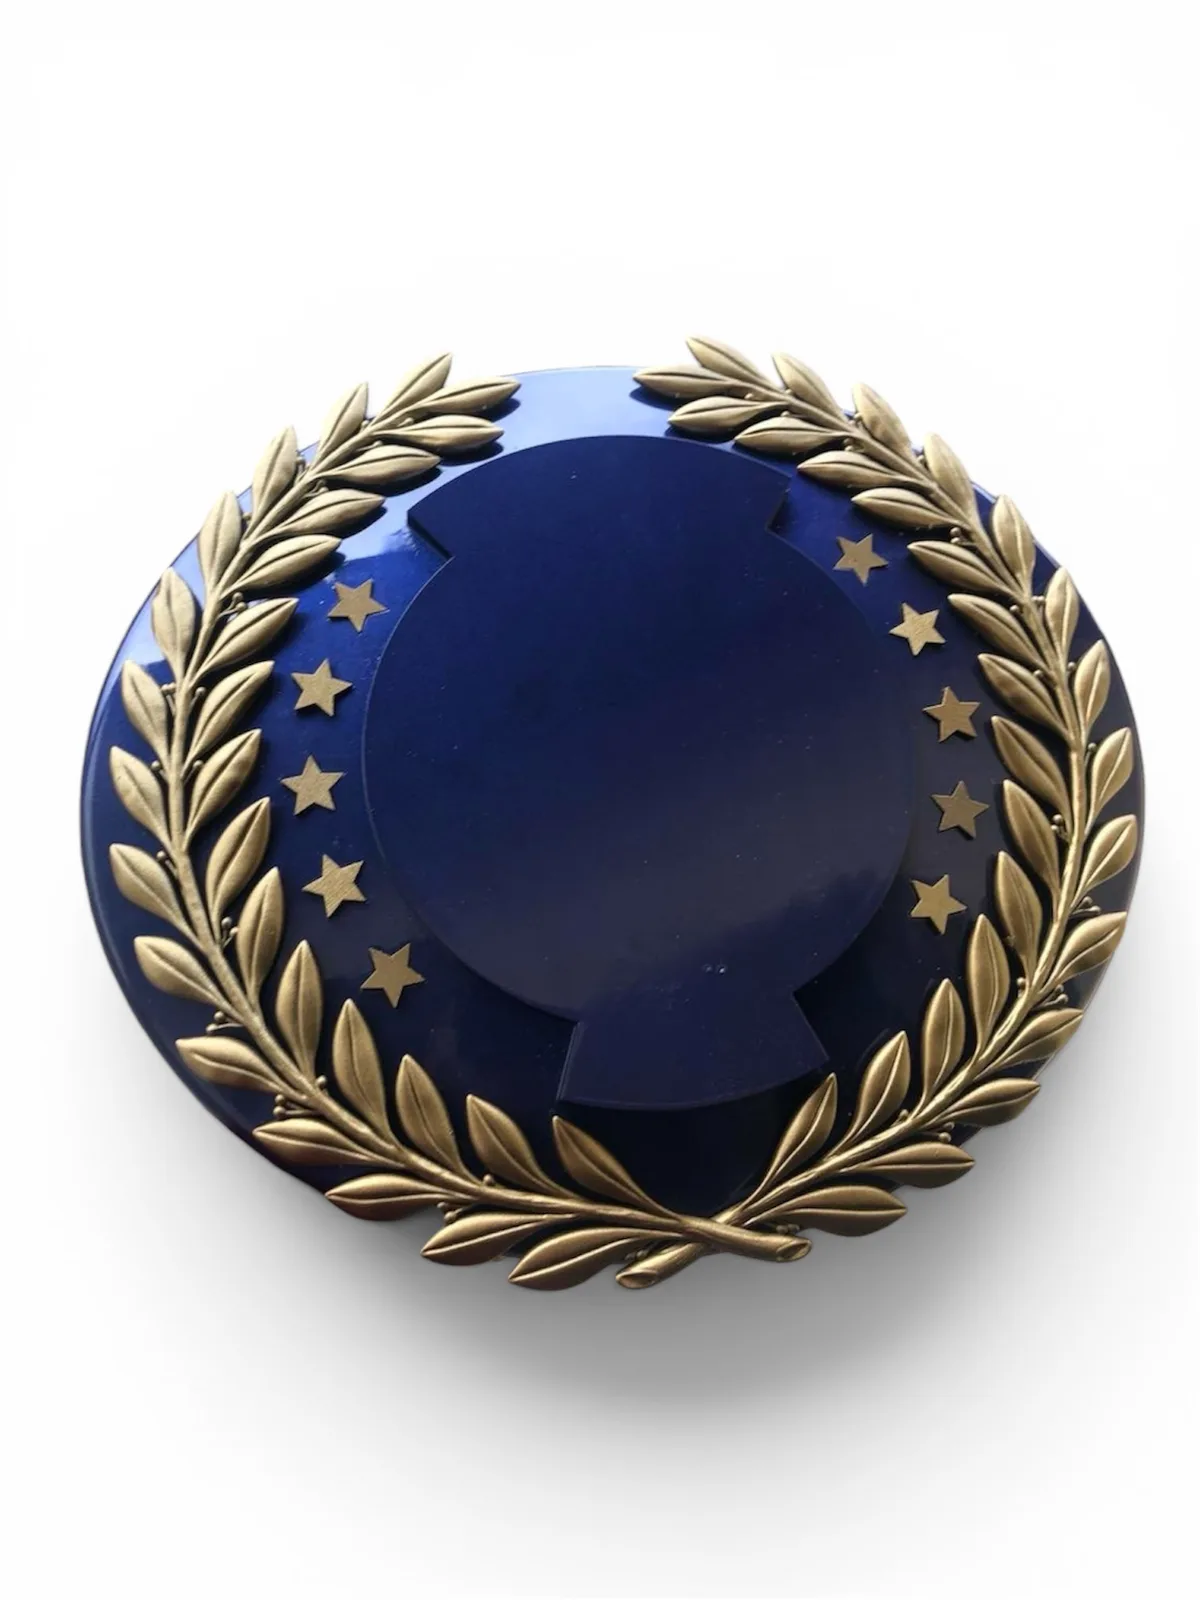
So we used MSLA 3D printing, which cures resin with light and delivers substantially higher surface detail. MSLA’s advantages in this application:
- reproducing extremely fine details,
- a smoother surface,
- minimal need for post-print sanding,
- accurate production of tiny decorative elements.
For the laurel leaves specifically, conventional sanding wouldn’t have been an effective option — the fine details could easily have been damaged.
Professional surface finishing for a television appearance
Once the right material and manufacturing technology were chosen, the next critical step was surface finishing. The printed parts went through the following process:
- two-component plastic priming,
- automotive-grade painting,
- heat-chamber drying,
- a satin protective lacquer coat.
This finishing chain ensured that the final pieces looked uniform, held up to regular use, and presented well in a professional television environment.
3D printing on its own is only the first part of the manufacturing process — a premium result also requires the right design, material choice, and post-processing.
A more durable mounting solution to eliminate the earlier problems
One of the most important improvements was redesigning the mounting. The earlier pieces were mounted with wire and adhesive — methods that can work for decoration in the short term, but loosen easily under regular use.
So during design, we built in mechanical mounting points: screw connections, precise fits, combined with adhesive where needed. This solution allows for faster assembly, makes repairs possible, and extends the piece’s service life.
The project’s result: higher-quality, manufacturable, durable emblems
By the end of the project, we had a fully rethought manufacturing solution: detail-rich geometry, excellent surface quality, an appearance suited to a television environment, a more durable structural design, and simpler assembly. We produced the belts for each weight class and category with distinct color coding.
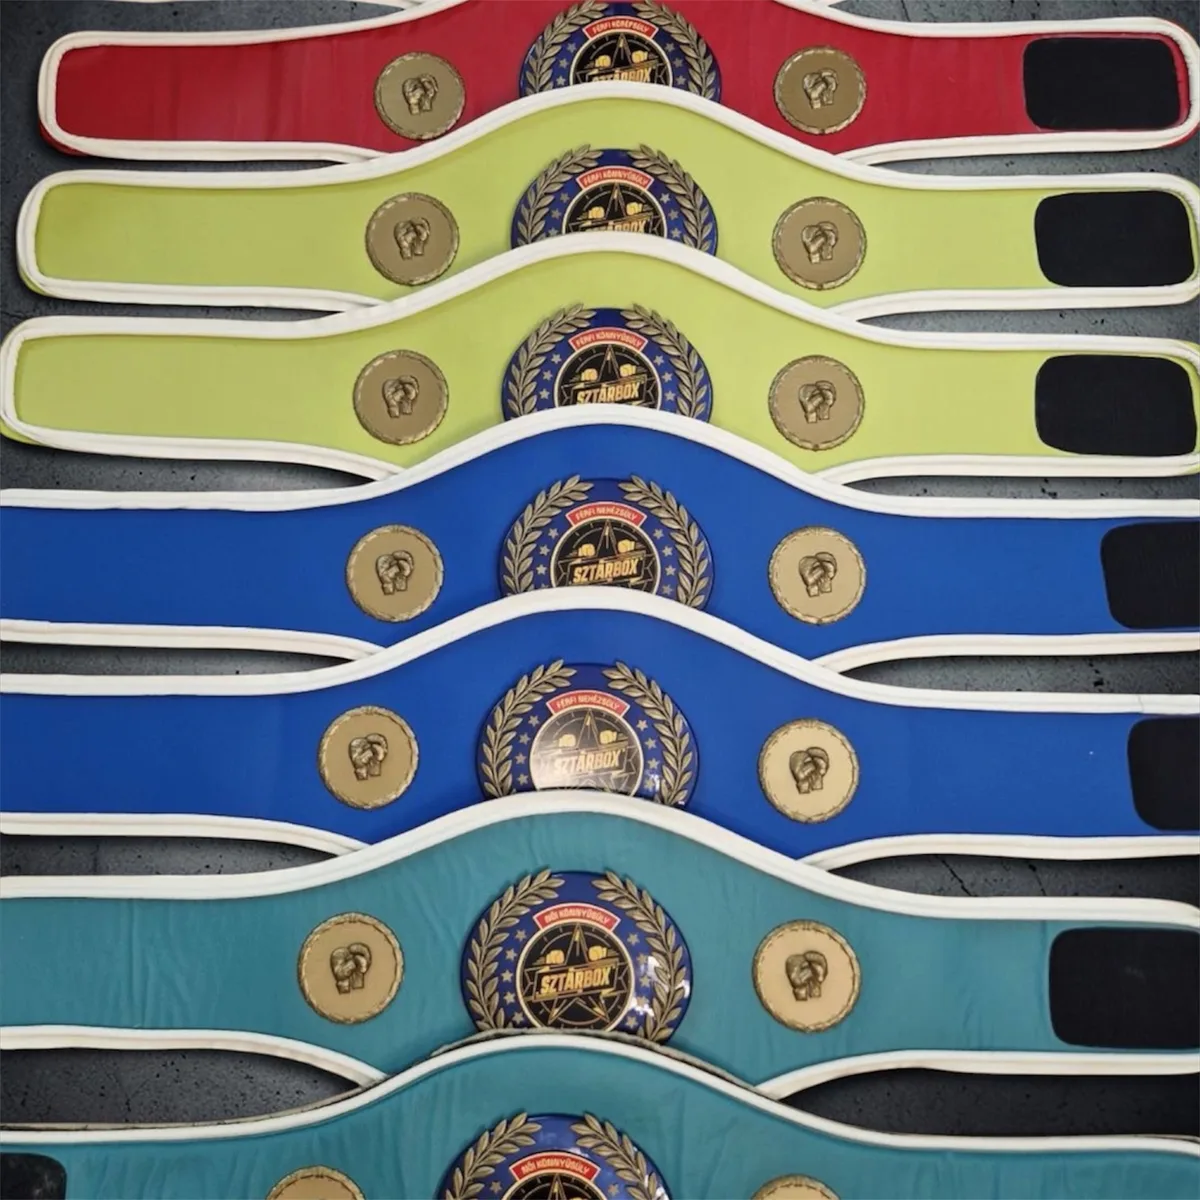
Starting from the previous sample pieces, what came out wasn’t a simple copy but an engineered, improved product. The finished emblem is also featured in our portfolio. This is a good example of how modern 3D printing and reverse-modeling isn’t just a prototyping tool — it can be a genuine production method for custom or small-batch parts where traditional manufacturing is too slow, too expensive, or not economical.
When is 3D scanning and additive manufacturing worth choosing?
Similar projects benefit especially from this approach when:
- there’s no factory CAD model available,
- an old part needs to be remanufactured,
- only a small quantity is needed,
- a fast development cycle is required,
- a custom design or complex geometry is involved.
In industrial parts manufacturing, 3D printing offers particular value for prototypes, jigs and fixtures, custom housings, decorative elements, and small-batch products. In an earlier project, remanufacturing a VW Golf 2 throttle lever, we followed this exact same 3D scanning + reverse-modeling + additive manufacturing workflow to replace a discontinued part.
Summary
Successful additive manufacturing isn’t purely a printing question — it takes engineering design experience, the right technology choice, material knowledge, and manufacturing-process thinking. Our team provides a complete solution from the first digital survey through to handing over the finished product: 3D scanning, reverse-modeling, CAD design, FDM and MSLA 3D printing, surface finishing, and small- to medium-batch parts manufacturing.
Whether it’s digitizing an old part, custom manufacturing, or a complex engineering development, we can help you find the right solution — get in touch for a quote on our 3D printing service for 3D scanning, reverse-modeling, or professional 3D-printed parts manufacturing.
Related Articles
Planning a Similar Project?
Send us your model or drawing — free consultation, with personalized quotes within 24 hours.